
RETECHNOLOGY PREMIUM MARKETPLACE RELATED PRODUCTS | WEBINARS | SPECIAL OFFERS


You are viewing our site as a Broker, Switch Your View:
Agent | Broker Reset Filters to Default Back to ListDocuSign Comments: A Quick and Dirty How-To
January 29 2018
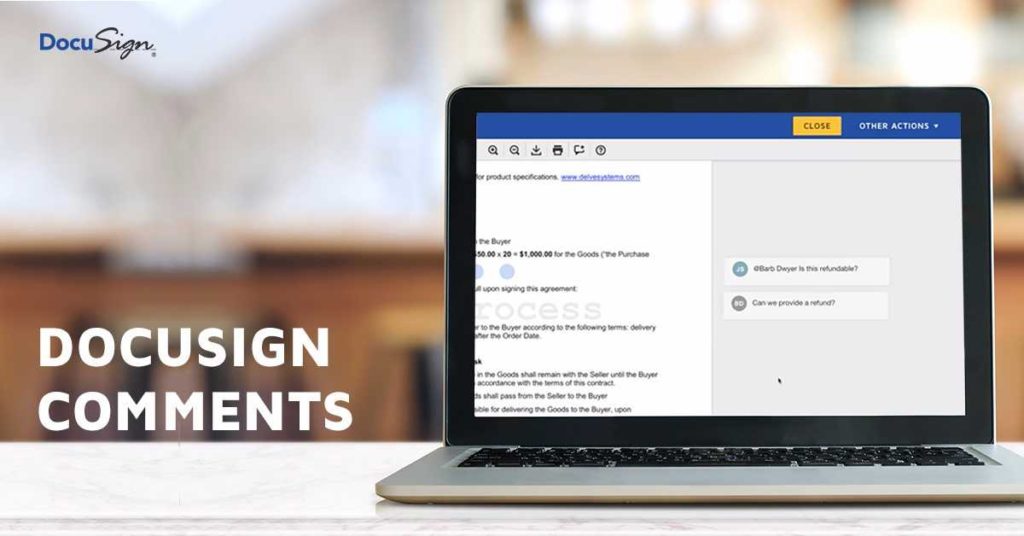 There's no substitute for real-time collaboration. As we progress further into the digital age, technology has enabled us to complete tasks more efficiently than ever before: Our groceries can be delivered with a few taps on our device. The lighting of our living rooms and the music playing in our homes can be changed with a simple, verbal request. And our contracts and agreements? They can be discussed directly, in real-time through DocuSign's Comments feature.
Comments is now available to all DocuSign customers and early adopters have been using Comments for a variety of use cases over the last few months. If you'd like to use Comments but it's not enabled for your account, you can reach out to support here to enable this new feature.
To help you hit the ground running, here's a quick and dirty how-to on enabling comments, plus a short video introducing the feature.
- Go to www.docusign.com and log in to your DocuSign account.
- In your DocuSign account, click the account menu drop down in the upper right corner and select Go to Admin, which opens DocuSign Admin.
In DocuSign Admin, on the left under Signing and Sending, click Comments.
On the right, under Comments Settings, check Enable comments in envelopes sent from this account checkbox and then click SAVE.
And voila! Done and done.
Now that you know how to enable comments, here are some quick tips to help you glean maximum value out of the feature.
Tip #1: Control whether comment text is included in email notifications
Depending on your type of organization, you may or may not want comment text to appear outside the DocuSign envelopes. However, with Comments — the choice is entirely in your control. Comment text is included by default in emails, but if you are an account admin, you can turn this ability off and on.
To control whether comment and reply text is included in email notifications:
- Go to www.docusign.com and log in to your DocuSign account.
- In your DocuSign account, click the account menu drop down in the upper right corner and select Go to Admin, which opens DocuSign Admin.
- On the right under Comments Settings:
- To enable the inclusion of comment and reply text in email notifications, check Include comment text in email notifications when a comment is posted, then click SAVE.
- To disable the inclusion of comment and reply text in email notifications, uncheck Include comment text in email notifications when a comment is posted, then click SAVE.
Tip #2: Control the frequency of comment notifications on envelopes you send and receive
Like to keep your email notifications at a minimum? Prefer to be pinged everytime there's a new development w/ an envelope? Either way, with DocuSign Comments, you're in complete control of the number of notifications you receive.
Here's how to control the frequency:
- Go to www.docusign.com and log in to your DocuSign account.
- In your DocuSign account, click the account menu drop-down in the upper right corner and select My Preferences.
- On the Preferences page, on the left under SIGNING AND SENDING, select Notifications.
On the right, under Sending Notifications:
- To enable comment notifications, check A comment is posted in an envelope I've sent.
- To disable comment notifications, uncheck A comment is posted in an envelope I've sent.
On the right, under Recipient Notifications:
- To enable comment notifications, check A comment is posted in an envelope that's been sent to me.
- To disable comment notifications, uncheck A comment is posted in an envelope that's been sent to me.
You can further customize the frequency of notifications by choosing whether you are notified every time one of your recipients comments or replies to a comment or whether the recipient chooses to reply only to you.
- To receive notification for all comments and replies, choose All comments.
- To receive notification of comments sent only to you, choose Only comments that mention me or are private to me.
- At the top (or bottom), click SAVE.
Tip #3: Accessing the Notification Center
- Go to www.docusign.com and log in to your DocuSign account.
- After logging into your DocuSign account, click the Notification Center icon in the upper right. If there is a red dot next to the Notification Center icon, it means you have a new comment or reply.
- In Notification Center, select the comment or reply you want to view.
- You can sort comments by selecting All or Unread on the left.
- Selecting a comment in the notifications list opens the document and takes you to the comment or reply.
Want to learn even more about how Comments can make coming to agreement simpler and easier? Look no further.
To view the original article, visit the DocuSign blog.